Getting Started with Swift for Android
Prerequisites
Before you begin Swift development for Android, make sure you have the following tools installed:
- Xcode (For macOS): If you don't have Xcode installed, it is recommended to install it from the Mac App Store. Xcode includes Swift, and the installation of Xcode will automatically include Swift as part of the development tools.
-
Android Studio with Android SDK and NDK:
Android Studio is the official integrated development environment (IDE) for Android app development.
To install Android Studio with all required components perform the following steps:
- Download Android Studio from the official website: Android Studio Download.
- Run the downloaded installer and follow the setup instructions.
- Launch Android Studio and complete the initial configuration, including the installation of the Android SDK.
- Open SDK Manager by selecting Tools -> SDK Manager in the main menu.
- In the SDK Tools tab, select the NDK(side by side) and CMake checkbox. Click OK to download and install.
- Install Android Emulator if you want to run on Android emulators
- SCADE IDE (Optional): If you are interested in using Scade for Swift development, you can download it from SCADE's official website: Scade Download.
Install Swift for Android
For macOS
- Download Swift Toolchain for Android
- Run the downloaded installer and follow the setup instructions.
-
You can verify installation by running the
scd list-installedcommand in the terminal. It should print full path to the installed Swift toolchain for Android.
For Linux
Currently Swift for Android is available for macOS only. It will be available for Linux very soon.
Create new Android project
- Open Android Studio.
-
Select File -> New -> New Project in the main menu.
-
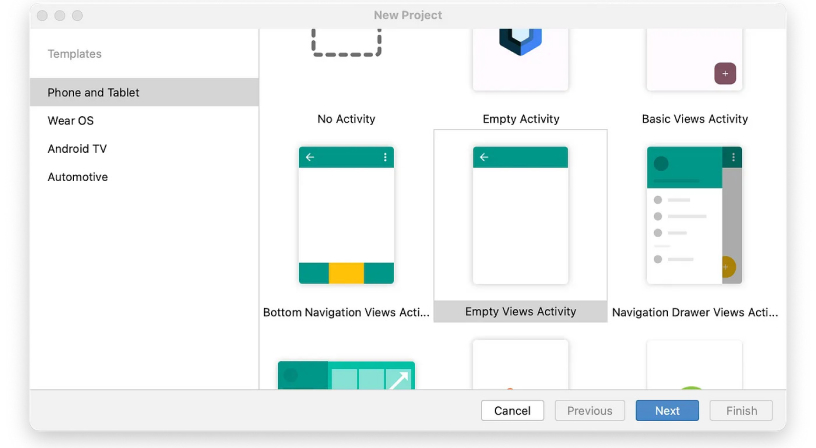
Choose a suitable template; for this guide, select "Empty Views Activity."
NOTE: Ensure you choose "Empty Views Activity," not "Empty Activity." - Provide project details such as name (e.g.,
SwiftAndroidExample) and package name (e.g.,com.example.swiftandroidexample). - Click "Next" to proceed.
Create Swift Package Manager (SPM) Project
-
Create a new SPM project within the
app/src/main/swiftsubdirectory, run the following commands in the terminal from the root project directory:
mkdir -p app/src/main/swift
cd app/src/main/swift
swift package init --name SwiftAndroidExample
It will create a new SPM project named
SwiftAndroidExamplewithin theapp/src/main/swiftsubdirectory.This project follows the standard structure of an SPM project and will be automatically built by Gradle as part of the Android project's build process with custom build tasks configured in thebuild.gradlefile. -
Change the product type to a dynamic library in the SPM project manifest. To do that, add the
type: .dynamicparameter in the library description in thePackage.swiftfile located in the SPM project directory:
products: [
    .library(
        name: "SwiftAndroidExample",
        type: .dynamic,                     // add this line
        targets: ["SwiftAndroidExample"]),
],
Configure Swift SPM project in build.gradle
To configure SPM project build, make the following changes in the app/build.gradle file:
-
Add the following code in the
androidsection:This informs Gradle to locate JNI libraries in the
sourceSets { main { jniLibs.srcDirs = ["lib"] } }libsubdirectory. -
In the
dependenciessection, add:
implementation fileTree(dir: 'lib', include: ['*.jar'])This line instructs Gradle to include .jar libraries in the resulting APK.
-
At the end of
app/build.gradle, insert the following custom Gradle task:
task buildSwiftProject(type: Exec) {
    commandLine 'scd',
            'archive', '--type', 'android',
            '--path', 'src/main/swift',
            '--platform', 'android-arm64-v8a',
            '--platform', 'android-x86_64'
}

tasks.whenTaskAdded { task ->
    if (task.name == 'assembleDebug' || task.name == 'assembleRelease') {
        task.dependsOn buildSwiftProject
    }
}
Initialize Swift Runtime and Load Swift Library
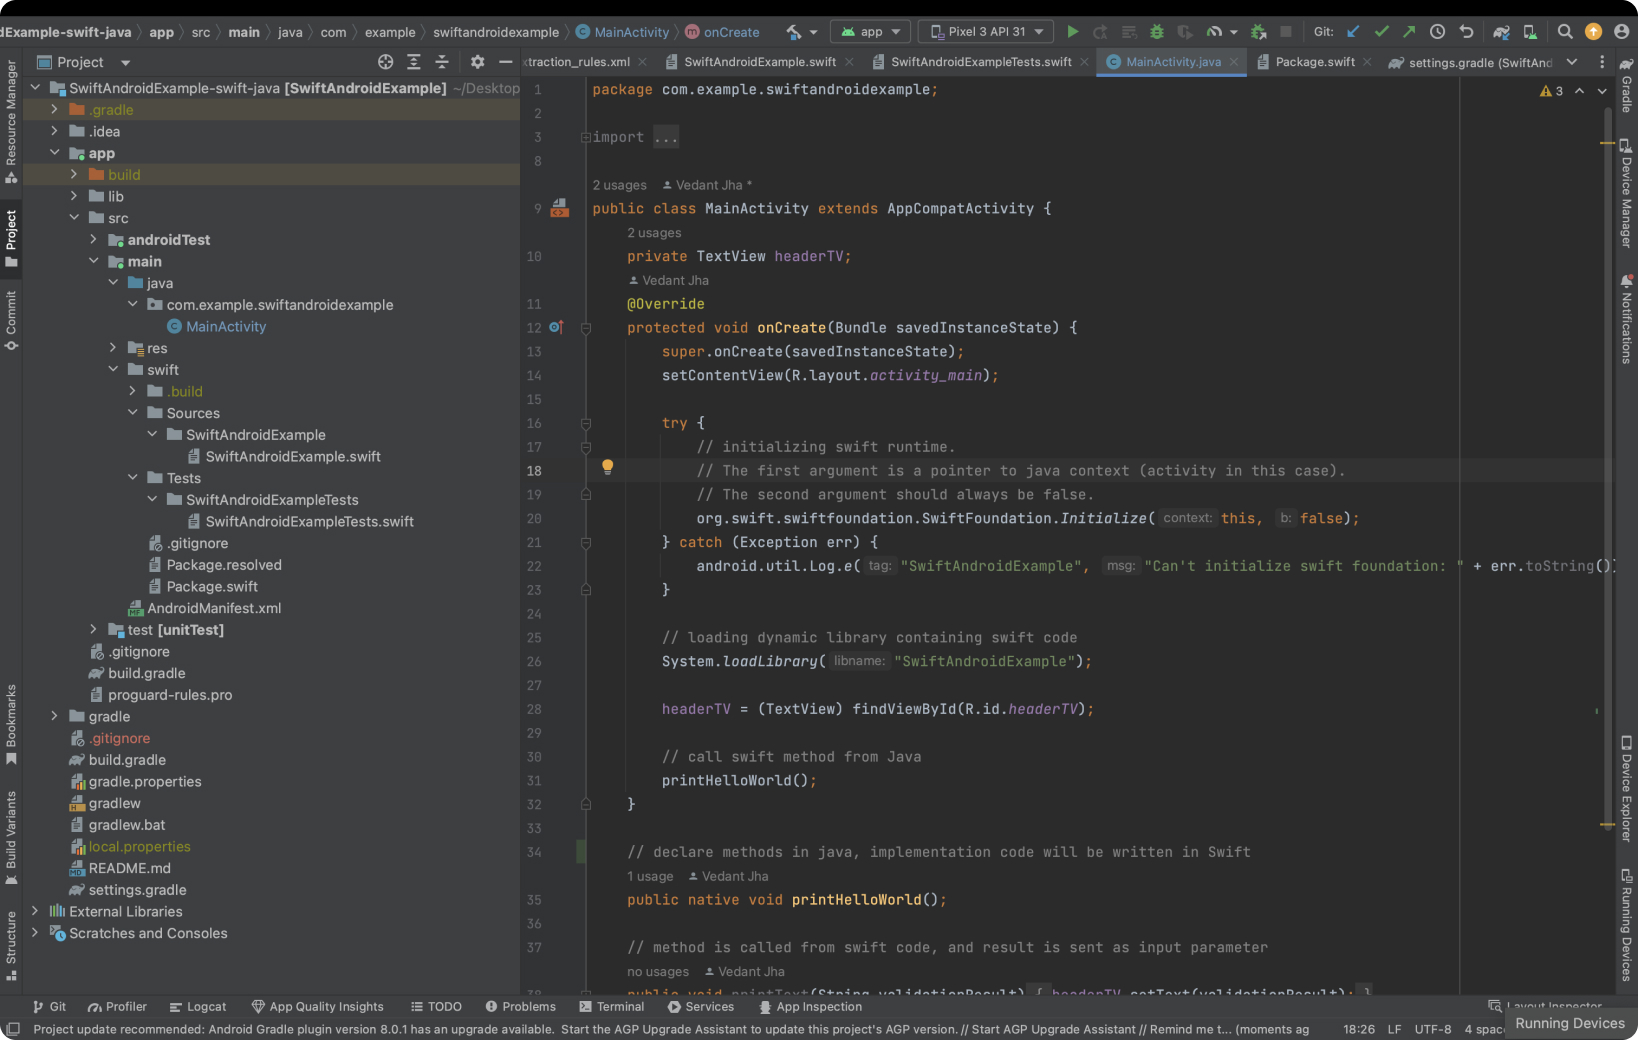
In MainActivity.java, add the following code in the onCreate method
which performs required Swift runtime initialization and loads the SwiftAndroidExample
JNI library containing Swift code from the SPM project:
@Override
protected void onCreate(Bundle savedInstanceState) {
    super.onCreate(savedInstanceState);
    setContentView(R.layout.activity_main);

    // Initialize Swift runtime and Swift Foundation library
    try {
        org.swift.swiftfoundation.SwiftFoundation.Initialize(this, false);
    } catch (Exception err) {
        android.util.Log.e("Swift", "Can't initialize Swift Foundation: " + err.toString());
    }

    // Load JNI library containing Swift code
    System.loadLibrary("SwiftAndroidExample");
}
Declare and call native Swift methods in Java
-
In the
MainActivityclass, declare a native method namedswiftHelloWorld:
public class MainActivity extends AppCompatActivity { // Declare a native method in Java, with the implementation in Swift private native String swiftHelloWorld(); // ... Rest of your MainActivity code } -
At the end of the
onCreatemethod of theMainActivityclass, add the following code:
@Override
protected void onCreate(Bundle savedInstanceState) {
    // ... Swift initialization code added before

    // Call the swiftHelloWorld method implemented in Swift
    String msg = swiftHelloWorld();

    // Display the value returned from swift in the text view
    android.widget.TextView text = new android.widget.TextView(this);
    text.setText(msg);
    text.setGravity(android.view.Gravity.CENTER_VERTICAL |
                    android.view.Gravity.CENTER_HORIZONTAL);
    text.setLayoutParams(new android.widget.RelativeLayout.LayoutParams(
            android.widget.RelativeLayout.LayoutParams.MATCH_PARENT,
            android.widget.RelativeLayout.LayoutParams.MATCH_PARENT));
    setContentView(text);
}
Implement native Java methods in Swift
Add the following code in the SwiftAndroidExample.swift source
located in the app/src/main/swift/Sources/SwiftAndroidExample
subdirectory of the Android project root:
import CJNI

// Use @_silgen_name attribute to set native name for a function called from Java
@_silgen_name("Java_com_example_swiftandroidexample_MainActivity_swiftHelloWorld")
public func MainActivity_swiftHelloWorld(
    env: UnsafeMutablePointer, activity: JavaObject
) -> JavaObject {
    let jstr = env.pointee.pointee.NewStringUTF(env, "Swift Hello World!")
    return jstr!
}
This Swift code implements the swiftHelloWorld Java native method of the
MainActivity class. The method is declared with the @_silgen_name
attribute to set correct name for the method implementation. It creates a new Java
string containing the message "Swift Hello World!" and returns it to the caller.
Run the SwiftAndroidExample application
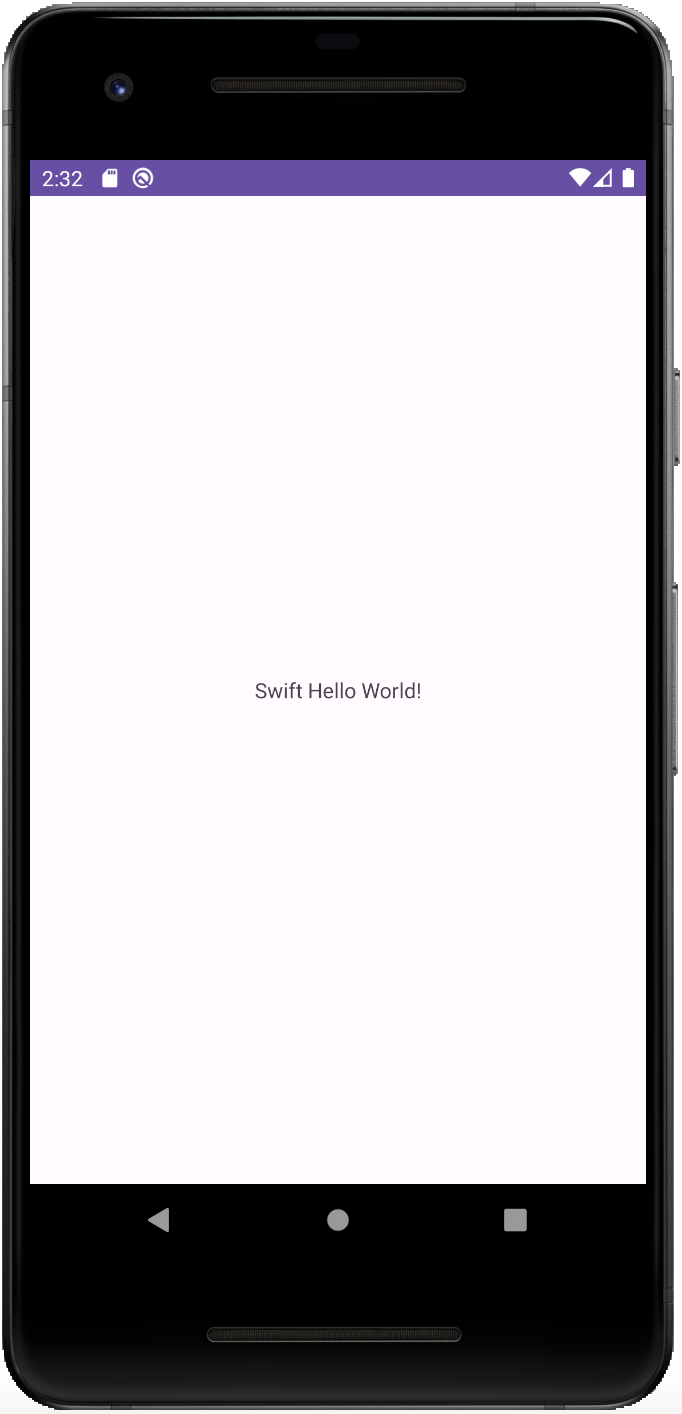
After completing the steps described in the previous sections, you can run the application
on Android and observe the results.
It will display a text view containing the text "Swift Hello World!".
Sources
-
Complete source code of the example application:
https://github.com/scade-platform/swift-android-example -
Github repository with all Swift Android Toolchain releases:
https://github.com/scade-platform/swift-android-toolchain/releases -
Detailed article about using Swift on Android:
https://medium.com/@SCADE/using-swift-pm-libraries-in-the-android-studio-projects-7cef47c300bf
Additional Articles
Ready to dive deeper? Here are some hand-picked resources covering various Swift features.